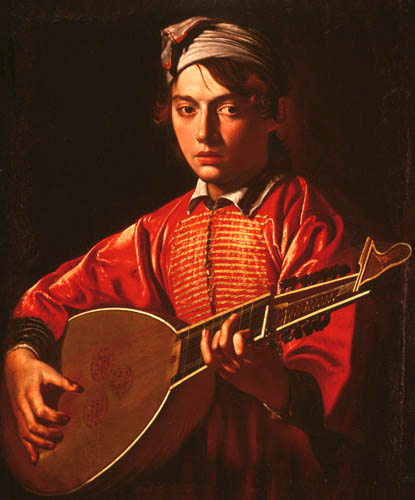
We looked at paintings of Rembrandt Harmenszoon van Rijn and Michelangelo Merisi Caravaggio, in which they utilised two different techniques of lighting in order to give off a certain style.
Narrow Lighting - This refers to when the lighting highlights the side of the subject which defines the cheekbone, creating shadows and allowing for a more dramatic/picturesque outcome. One side of the nose will be lit whereas the other side will be shadowed, allowing the subject to look more aesthetically pleasing.
Broad Lighting - This refers to the lighting in which it fills the side of the subject's face by highlighting all areas of their face. This in turn gives the picture a unique element, in which the subject's facial details are more present to the viewer.
Rembrandt's paintings utilised the use of broad lighting by filling the subject's face with light that highlighted their features in order to show their heritage. This in turn gives the viewer the knowledge that the paintings represented a real person i.e. The person in the painting wanted their nose to be prominent so the viewer knows that they come from a long line of people with similar noses.
Caravaggio's paintings used a more dramatic approach, highlighting the narrow side of the face. this will therefore create shadows around the cheekbones and under the eyes, which brings forth more of a 'captured moment'.
During our studio shoot, we were tasked with trying to replicate the broad and narrow lighting techniques. We were split up into groups and tested the lighting on two subjects. We were given advice from Beytan on how to direct during a photoshoot, such as using your hand to show the person where to look and not being afraid to manipulate their hair (as long as we had permission to touch first).
The above picture was a narrow lighting shot, in which we positioned the light to the subject's right side. We then got her to turn her head slightly in order to create a shadow under the cheekbone. It was also vital to get the studio lights reflected from her pupils.
The second picture is one I took in which the lighting is broad. This details the subject's cheek, covering most of the face and showing more of the facial features.


No comments:
Post a Comment