Showing posts with label Maya 3D. Show all posts

Sunday, 22 March 2015

Maya 3D - UFO

The final task was to create a UFO. I began by creating a very thin cylindrical object. Using the extrude tool, I dragged it to the centre from both sides to create a slant. This would be the base of the UFO.

In order to create the dome, I made a sphere and cut out half of it. By placing it in the centre of the cylindrical object, I used the 'slide edge tool' to link it to the other shape (after combining both mesh). This would therefore allow both objects to be manipulated together.


I worked on the underside of the UFO, adding detail to it by extruding inwards to create the 'abduction hole'. 


In addition, I selected alternative faces along the underside of the object and extruded to slightly scale down and push inwards. This would create a nice 3D look to the UFO. I also hardened the edges to the panel in order to give off a mechanical look to it.


The below pictures show the final piece of the created object.


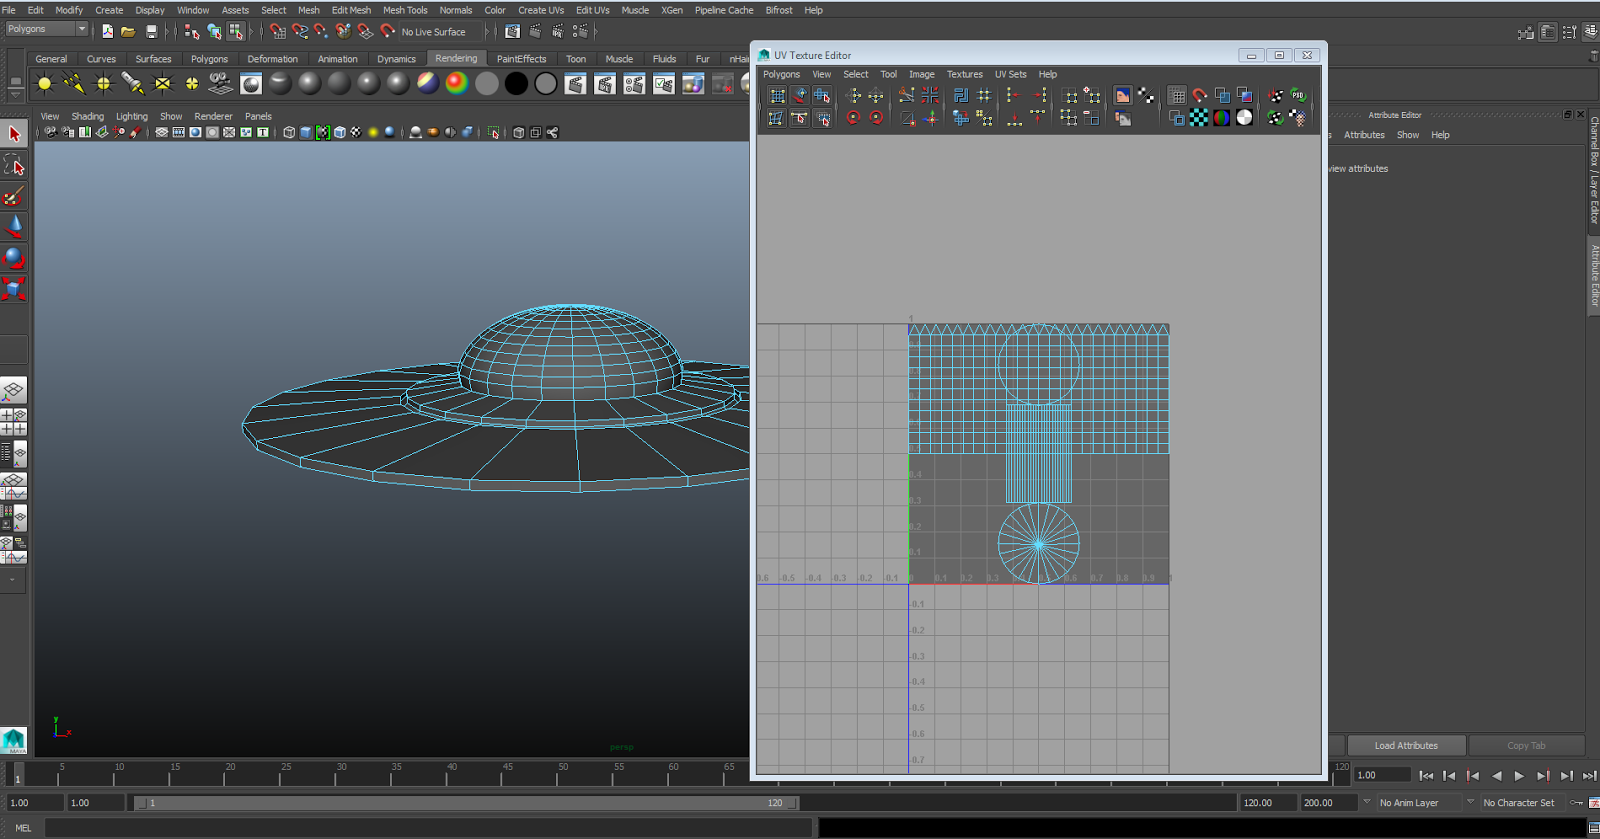
Once I was happy with the overall look, it was time to texture the final piece. I created a UV map of the object and began separating and spacing out the pieces in order to create a texture in photoshop.


I used shapes to cover various parts of the ship, also adding a feint texture over the entire piece. Once completed, I used this to cover the UFO


The below picture shows what the UFO looked like after adding the texture. I wasn't entirely happy with the outcome, as it appeared to have bled through a certain part of the cylindrical object. Therefore I decided to add texture to separate parts of the ship by selecting individual faces and adding texture to them.


I started by selecting the affected area and replacing it with a Blinn, using a texture I was happy with. I was very happy with its outcome, as it create a nice line effect over the top of the cylinder.


Next I selected the inwards panels on the underside of the UFO and changed the colour of them to black. I then changed the colour of the abduction hole to a light green, also changing the ring around the ship into a dark green and ridge around the dome.


Maya 3D - Planet

I began creating my planet by using the Sculptris software which I downloaded to my laptop. By using the various tools, I was able to manipulate the object (similar to clay). The more I manipulated the object, the more triangles were created. This would make it a more complex object as there are more points of manipulation.


I saved the file and imported it easily into Maya. However, the problem with this object was that it was way too complex, as it had many points of manipulation. This would deem difficult when creating a UV map.


To fix this issue, I had to 'Bake' the object over a sphere object. This was created by setting the Target (the sphere) and Source (Sculpt), in which I used the normal map. However, the first attempt didn't seem to work too much, therefore I used the ambient map to create the final outcome. The outcome was very feint, however I was happy with it and added a planet texture over the top


Maya 3D - Asteroid

In order to create the asteroid, I started with a spherical shape. The 'soft selection' tool was an important feature in the creation of this object, as it allowed me to manipulate without it being too clunky.


The soft select tool allowed me to select an area of which I was able to drag and pull/squash different parts of the object. This helped me with the base of the asteroid, as it has an uneven shape.


Once I was happy with the outcome, the next step was to add texture to the shape. This was completed by adding a Blinn material. I saved an image of an asteroid texture, which placed it over the shape.


The below image shows the UV texture editor, which shows the map of the asteroid. The image behind shows where it fits over the asteroid.


Thursday, 12 March 2015

Maya 3D - Creating the Spaceship

For the first session, I was required to create a 3D spaceship on Maya. This was a fairly simple process. The 'extrude' tool was essential in making this, as it allowed me to drag objects out of another.

The first step was to create a cube. I used the scale tool to expand it to the length that I was happy with. By selecting a face, I was able to use the extrude tool simultaneously with the scaling tool in order to drag out another object from the cube. This allowed me to create the wings of the spaceship. I was then able to drag the wing to the side in order to make it look more authentic. The front of the spaceship was extruded outwards and scaled down for it to have a slope.


The next step was to create the indents on the ship. This, again, used the extrude tool in order to scale down a face of an object and then dragged inwards, therefore creating a gap inside.

I made sure that the holes were on both the front and back of the ship (where the thrusters would go).


 Once completed, I had a solid look for the spaceship, which would be the base of the design. However, to make it look less clunky, I used the 'mesh' option by selecting the whole object and holding spacebar. This gave me the option to smooth the object once selecting form the mesh menu. I changed the division levels to 3 and applied it to the object, thus giving me a more curved and natural looking object.


I was happy with the overall look of the spaceship, therefore the next step was to create the texture. I used the Blinn material by highlighting the entire spaceship and changing its colour to Jet black. I then decided to colour in the holes where the spaceship's engines would be.

For this process, I selected the face option and used the paintbrush tool to select the inside of the hole. I then neatened the selection by using the shift key and single selecting areas which were unselected. Once i was happy with the selection, I changed the colour to a light blue, giving a futuristic/sci-fi look. I noticed that some of the blue had come through on the other side. To fix this I had to select the affected areas and re-colour them black. I repeated this process to each of the holes in order to get the final outcome. (pictures below).