Showing posts with label Professional Toolkit. Show all posts

Sunday, 22 March 2015

Maya 3D - UFO

The final task was to create a UFO. I began by creating a very thin cylindrical object. Using the extrude tool, I dragged it to the centre from both sides to create a slant. This would be the base of the UFO.

In order to create the dome, I made a sphere and cut out half of it. By placing it in the centre of the cylindrical object, I used the 'slide edge tool' to link it to the other shape (after combining both mesh). This would therefore allow both objects to be manipulated together.


I worked on the underside of the UFO, adding detail to it by extruding inwards to create the 'abduction hole'. 


In addition, I selected alternative faces along the underside of the object and extruded to slightly scale down and push inwards. This would create a nice 3D look to the UFO. I also hardened the edges to the panel in order to give off a mechanical look to it.


The below pictures show the final piece of the created object.


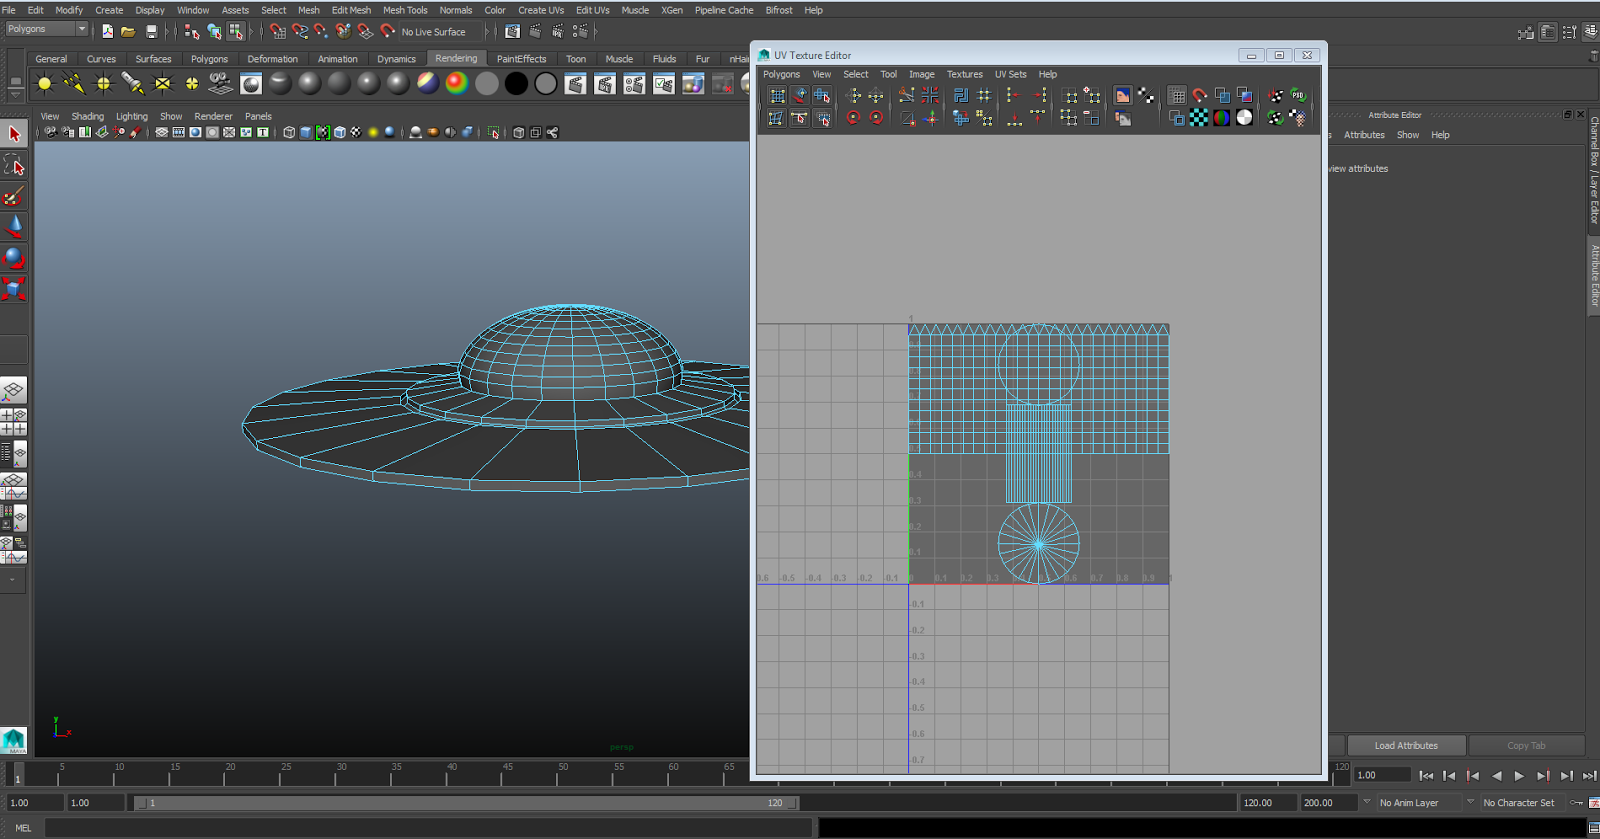
Once I was happy with the overall look, it was time to texture the final piece. I created a UV map of the object and began separating and spacing out the pieces in order to create a texture in photoshop.


I used shapes to cover various parts of the ship, also adding a feint texture over the entire piece. Once completed, I used this to cover the UFO


The below picture shows what the UFO looked like after adding the texture. I wasn't entirely happy with the outcome, as it appeared to have bled through a certain part of the cylindrical object. Therefore I decided to add texture to separate parts of the ship by selecting individual faces and adding texture to them.


I started by selecting the affected area and replacing it with a Blinn, using a texture I was happy with. I was very happy with its outcome, as it create a nice line effect over the top of the cylinder.


Next I selected the inwards panels on the underside of the UFO and changed the colour of them to black. I then changed the colour of the abduction hole to a light green, also changing the ring around the ship into a dark green and ridge around the dome.


Maya 3D - Planet

I began creating my planet by using the Sculptris software which I downloaded to my laptop. By using the various tools, I was able to manipulate the object (similar to clay). The more I manipulated the object, the more triangles were created. This would make it a more complex object as there are more points of manipulation.


I saved the file and imported it easily into Maya. However, the problem with this object was that it was way too complex, as it had many points of manipulation. This would deem difficult when creating a UV map.


To fix this issue, I had to 'Bake' the object over a sphere object. This was created by setting the Target (the sphere) and Source (Sculpt), in which I used the normal map. However, the first attempt didn't seem to work too much, therefore I used the ambient map to create the final outcome. The outcome was very feint, however I was happy with it and added a planet texture over the top


Maya 3D - Asteroid

In order to create the asteroid, I started with a spherical shape. The 'soft selection' tool was an important feature in the creation of this object, as it allowed me to manipulate without it being too clunky.


The soft select tool allowed me to select an area of which I was able to drag and pull/squash different parts of the object. This helped me with the base of the asteroid, as it has an uneven shape.


Once I was happy with the outcome, the next step was to add texture to the shape. This was completed by adding a Blinn material. I saved an image of an asteroid texture, which placed it over the shape.


The below image shows the UV texture editor, which shows the map of the asteroid. The image behind shows where it fits over the asteroid.


Thursday, 12 March 2015

Maya 3D - Creating the Spaceship

For the first session, I was required to create a 3D spaceship on Maya. This was a fairly simple process. The 'extrude' tool was essential in making this, as it allowed me to drag objects out of another.

The first step was to create a cube. I used the scale tool to expand it to the length that I was happy with. By selecting a face, I was able to use the extrude tool simultaneously with the scaling tool in order to drag out another object from the cube. This allowed me to create the wings of the spaceship. I was then able to drag the wing to the side in order to make it look more authentic. The front of the spaceship was extruded outwards and scaled down for it to have a slope.


The next step was to create the indents on the ship. This, again, used the extrude tool in order to scale down a face of an object and then dragged inwards, therefore creating a gap inside.

I made sure that the holes were on both the front and back of the ship (where the thrusters would go).


 Once completed, I had a solid look for the spaceship, which would be the base of the design. However, to make it look less clunky, I used the 'mesh' option by selecting the whole object and holding spacebar. This gave me the option to smooth the object once selecting form the mesh menu. I changed the division levels to 3 and applied it to the object, thus giving me a more curved and natural looking object.


I was happy with the overall look of the spaceship, therefore the next step was to create the texture. I used the Blinn material by highlighting the entire spaceship and changing its colour to Jet black. I then decided to colour in the holes where the spaceship's engines would be.

For this process, I selected the face option and used the paintbrush tool to select the inside of the hole. I then neatened the selection by using the shift key and single selecting areas which were unselected. Once i was happy with the selection, I changed the colour to a light blue, giving a futuristic/sci-fi look. I noticed that some of the blue had come through on the other side. To fix this I had to select the affected areas and re-colour them black. I repeated this process to each of the holes in order to get the final outcome. (pictures below).


Thursday, 5 March 2015

Professional Toolkit - Photography - Broad and Narrow Lighting


During the photography workshop in the studio, we gained vital tips on the way lighting has a great effect on the way a picture can be perceived due to the positioning of a subject.

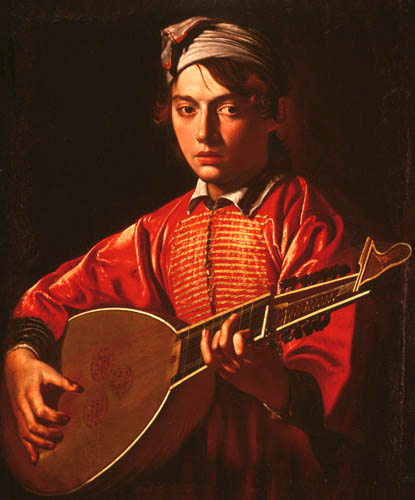
We looked at paintings of Rembrandt Harmenszoon van Rijn and Michelangelo Merisi Caravaggio, in which they utilised two different techniques of lighting in order to give off a certain style.

Narrow Lighting - This refers to when the lighting highlights the side of the subject which defines the cheekbone, creating shadows and allowing for a more dramatic/picturesque outcome. One side of the nose will be lit whereas the other side will be shadowed, allowing the subject to look more aesthetically pleasing.

Broad Lighting - This refers to the lighting in which it fills the side of the subject's face by highlighting all areas of their face. This in turn gives the picture a unique element, in which the subject's facial details are more present to the viewer.

Rembrandt's paintings utilised the use of broad lighting by filling the subject's face with light that highlighted their features in order to show their heritage. This in turn gives the viewer the knowledge that the paintings represented a real person i.e. The person in the painting wanted their nose to be prominent so the viewer knows that they come from a long line of people with similar noses.


Caravaggio's paintings used a more dramatic approach, highlighting the narrow side of the face. this will therefore create shadows around the cheekbones and under the eyes, which brings forth more of a 'captured moment'.


During our studio shoot, we were tasked with trying to replicate the broad and narrow lighting techniques. We were split up into groups and tested the lighting on two subjects. We were given advice from Beytan on how to direct during a photoshoot, such as using your hand to show the person where to look and not being afraid to manipulate their hair (as long as we had permission to touch first).


The above picture was a narrow lighting shot, in which we positioned the light to the subject's right side. We then got her to turn her head slightly in order to create a shadow under the cheekbone. It was also vital to get the studio lights reflected from her pupils.


The second picture is one I took in which the lighting is broad. This details the subject's cheek, covering most of the face and showing more of the facial features. 


Saturday, 15 November 2014

Studio Shoot - Building The Set and Lighting

To build the set we required 2 walls (one with a hole in the middle, being the scene where the character breaks through it with text books, the other will be the backside of Group A's set) , we used five walls (3 drilled together and 2 on either side for support). The centre wall requires a hole which will be covered with material for the breakthrough scene.

We tested the lighting in some of the scenes which relates back to my research, where we tried to get a dark, shadowy effect in order to create a contrast to the bright, vibrant second scene.
Pictures by Charlie Whitworth (Cinematographer)
As shown in the above pictures (Taken by Charlie), we tried some methods to create an eery style of lighting for the set. We decided that there will be two lights, one coming from the outside of the cell into the room, and the other being the light from the ceiling of the cell. Therefore, we experimented to try and create something that would balance out for the filming of the scene. On the left of the images, the subject looked too bright, allowing for the scene to be less eery, therefore we tried to correct this by lowering both lights (Above centre) but allowing the ceiling light to be brighter that the outside light but slightly behind the subject. This gave a nice glow on the top of the subject (similar to the Bronson still from my lighting research) with the facial features slightly visible but not too pungent. The biggest challenge of creating the lighting for this scene is to make the right balance between the subject and the set around it (Bottom Centre). Although the lighting here was somewhat okay for the camera, it looked more like a Stage Play than a short film. Finally we tried to create a darker atmosphere by switching off the outside light and lowering the ceiling light until all we could see was the outline of the subject. Despite looking good on set, on camera it came out too dark, making it unclear on what the set looks like to the audience.

We sanded down the section of the wall which had bits of plaster attached to them giving it a smoother edge, however we ended up taking down the wallpaper any as there were bits missing from the wall which would create a dent whilst putting the new wallpaper over it.

In order to clear the walls, we needed to remove all the wallpaper from it, therefore all of us peeled it off using our hands or a wall scraper with warm water allowing it to peel off easily. It was also important to remove any extra nails that were sticking out of the walls by using a hammer and pulling them off individually.


Wednesday, 8 October 2014

Sound Design - Soundscape Project

For the sound project, we are required to create a soundscape based on a 30 second - 1 minute long text/narrative. By recording various sounds and using Pro Tools, this will then reflect on the text by use of different effects such as reverb and delay, which will add a sense of spacing to the audio.


Narrative text:
"A narrative is like a room on whose walls a number of false doors have been painted; while within the narrative, we have many apparent choices of exit, but when the author leads us to one particular door, we know it is the right one because it opens."


Using this quote, I structured a basic outline for what will happen in the narrative. My idea involves the following:


"A narrative is like a room..."

Outdoor footsteps leading into an indoor environment. Indoor footsteps indicating the character is inside a room. (Echoing footsteps on marble or wooden floor)


"...on whose walls a number of false doors have been painted..."

Spray paint/Paint brush sounds. Indicating the painting of the doors.

"...while within the narrative, we have many apparent choices of exit..."
Door knocking, Turning of door knobs/locks. Sounds panning left and right giving us a sense of space. The audience realises that these doors are the fake ones, restricting the character from entering.

"...but when the author leads us to one particular door..."
Door creaking open to indicate the narrative continuing. Droning noise indicates an aura behind the open door, leading the character to the continuation of the "narrative".

"we know it is the right one because it opens."
Footsteps leading away through the door, becoming faint towards the end of the audio.


I was able to book out a Roland in order to start my sound recording for the project. During recording, I managed to record various sounds in order to add them to pro tools to start the editing. For the painting sound, I was restricted as I didn't have the necessary objects in order to gain the right audio (Spray paint can noises and paintbrush noise).

Therefore, I used a deodorant spray can to recreate the noise of a spray paint can. In order to recreate the noise of the ball inside the can when shaking it, I used a tub of Sainsbury's multivitamins and used just one tablet whilst shaking it. This created both an echoed sound plus giving me a close enough interpretation to a spray paint can noise.


For the paint brush sounds, I put the microphone up close to a wall and brushed my hand against it in a sweeping motion. The footsteps I recorded for the beginning of the soundscape were recording on gravel, eventually leading onto concrete and inside a house (being the room for the narrative). I used the sound of someone fiddling with a door knob and the creaking of a door hinge in order to create the sound of the opening of the narrative at the end.

The Roland was very simple to use, as I had taken on my experience of using this in the previous year for Experimental Sound. I used the settings of 48KHz and 16 Bit when recording.

Once I had all my recordings, it was time to import them into Pro Tools during the workshop. 

The first thing I did once importing all the audio was to listen to them individually and renaming them to what sound they were, making it easier to distinguish them once the editing begins on the timeline. One thing I noticed immediately once I imported the audio onto the timeline was the fact that the soundwaves were thin, meaning that the volume was low. I quickly corrected this by using the audio gain in the bottom left corner and dragging up on the meter, allowing the volume to increase.


In order to make the audio fade, I used the shortcut of Command + F, which allowed me to create a length of fade on whichever clip I wanted from either the start or the end. This prevents the soundclip from immediately cutting off, allowing for a smoother listening experience.

The button on the bottom right of the numeric keypad (enter button) is used for setting markers within the timeline. This gives me the opportunity to know exactly where important points of the timeline are (such as important cuts or when a certain moment of the scenario happens within the timeline) without having to keep playing and listening to the audio. I am also able to rename the marker (which appears above the timeline) which allows me to easily distinguish which point of the soundscape is which.


After the first session of editing, I managed to create a rough structure of what I wanted for my final outcome. using various different methods of technique such as panning and reverb to add some space in this fictional audio universe. I managed to use the pencil tool in order to draw exactly where I wanted the audio to pan, allowing me to alter it to exactly where I wanted it to pan. In addition, Harry helped show me how to add a droning noise to the timeline, which fit into the end of the soundscape while the door creaks open. Once I had a general outline of the structure of my sound edit, I realised that I needed to recreate some of the audio in order to make it clearer to the audience on what was happening (such as the footsteps and door noises). The first session was basically an experiment for my final project, as I was playing with the different effects I can use whilst finding out on my flaws and what I can improve.


For the second session of recording, I took out a Marantz recorder and recorded a voice over for the soundscape. I ensured that I recorded many different pronunciations of the quote in order to give me more variety when selecting the right audio. I made sure that during recording I wasn't recording too loud for the microphone to pick up by turning the dial down between 6 and 7 and paying close attention to the lights below it (making sure it didn't reach the red section). I did have some difficulties with battery power (charging it over night but it kept turning off after 30 seconds from low battery), however I managed to get the recordings I needed for the edit.
Once completed, I layered the voice over on top of the sound audio, therefore allowing me to map out where and when the correct sounds would come in. I made use of the marker to easily distinguish when a certain part of the audio will start, allowing for a less tedious edit.


Adding the voice over allowed me to have a visual understanding of what audio I needed to space out, as during the first session I realised that all my sound files were too close together and sounded like a mash-up of audio rather than a timed, spaced out soundscape.

During the opening part of the soundscape, I noted that the footsteps were outside, however I wanted it to transition into an indoor environment as the 'walls' were mentioned. Using the crossfade tool, I was able to put together a smooth transition from outdoors to indoors which gave the sound a room tone.


Once I was happy with the overall edit, I needed to ensure that the audio did not exceed -10db. This was completed by adding a Master track, allowing me to see exactly at which point the audio passed the limit. I noticed that only two recordings (the turning of the lock and the door creak) became too loud at certain points, therefore I used a compresser in order for the sound to automatically reduce if it managed to surpass -10db.


After I was happy with everything, I exported the audio, making sure of the right format (16 bit and 48kHz).

In conclusion, I am happy with the outcome as I felt the recordings were clear and edited to give the audience an understanding of the quote. Ways I would like to improve the recording would be to maybe add some extra aesthetics (such as birds tweeting once the door opens, signifying an outdoor area to the audience), however I am pleased with the way it turned out and enjoyed the experience of sound foley and recreating sounds (spraypaint can, paintbrush).